Woodworker's Journal 2004 Summer, страница 43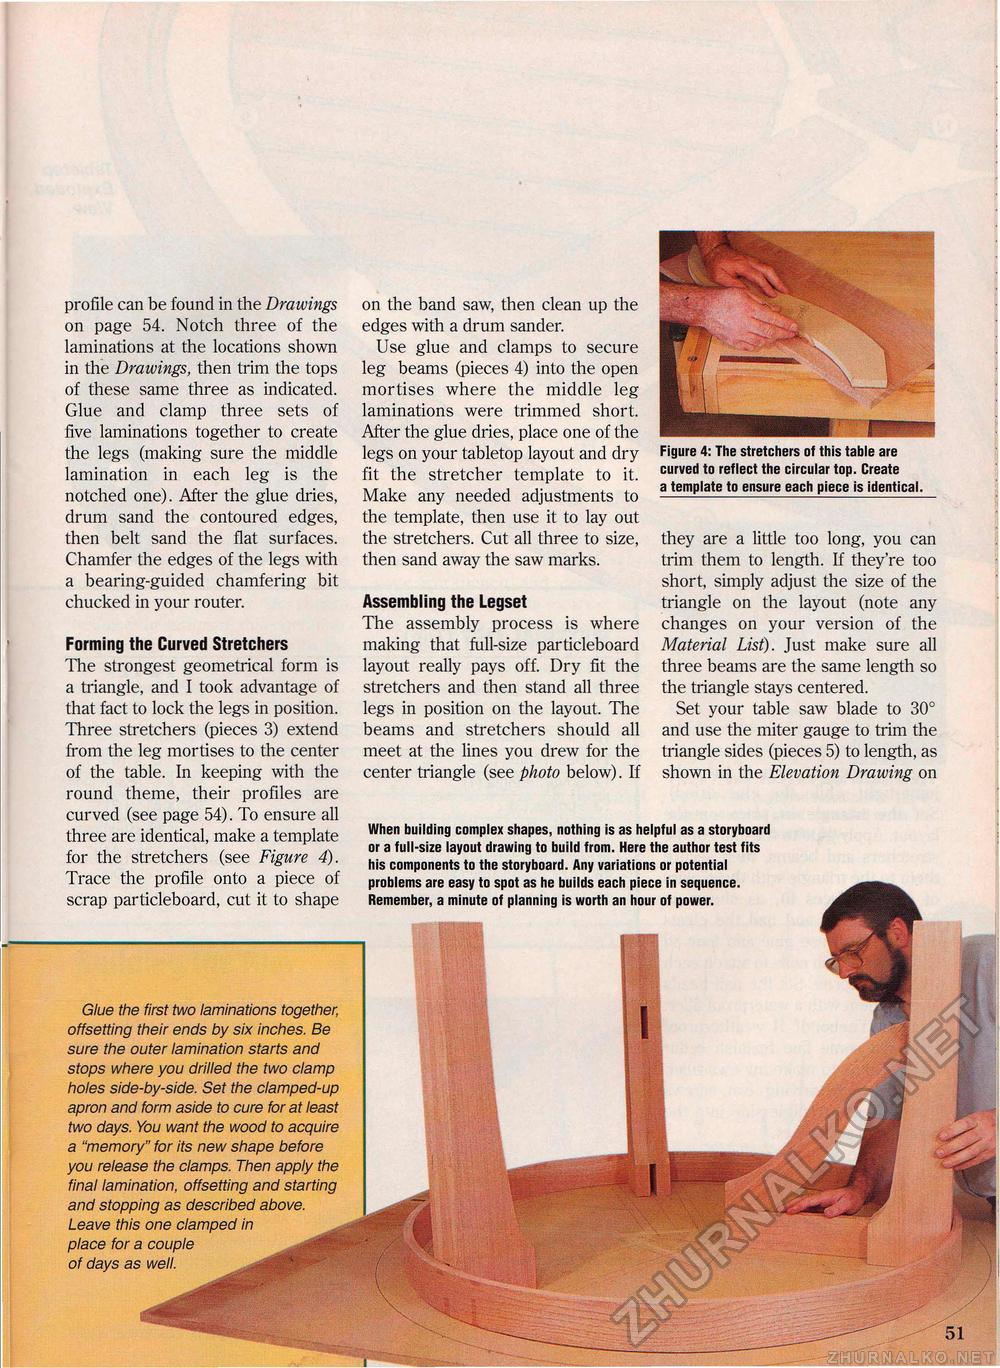
profile can be found in the Drawings on page 54. Notch three of the laminations at the locations shown in the Drawings, then trim the tops of these same three as indicated. Glue and clamp three sets of five laminations together to create the legs (making sure the middle lamination in each leg is the notched one). After the glue dries, drum sand the contoured edges, then belt sand the flat surfaces. Chamfer the edges of the legs with a bearing-guided chamfering bit chucked in your router. Forming the Curved Stretchers The strongest geometrical form is a triangle, and I took advantage of that fact to lock the legs in position. Three stretchers (pieces 3) extend from the leg mortises to the center of the table. In keeping with the round theme, their profiles are curved (see page 54). To ensure all three are identical, make a template for the stretchers (see Figure 4). Trace the profile onto a piece of scrap particleboard, cut it to shape on the band saw, then clean up the edges with a drum sander. Use glue and clamps to secure leg beams (pieces 4) into the open mortises where the middle leg laminations were trimmed short. After the glue dries, place one of the legs on your tabletop layout and dry fit the stretcher template to it. Make any needed adjustments to the template, then use it to lay out the stretchers. Cut all three to size, then sand away the saw marks. Assembling the Legset The assembly process is where making that full-size particleboard layout really pays off. Dry fit the stretchers and then stand all three legs in position on the layout. The beams and stretchers should all meet at the lines you drew for the center triangle (see photo below). If Figure 4: The stretchers of this table are curved to reflect the circular top. Create a template to ensure each piece is identical. they are a little too long, you can trim them to length. If they're too short, simply adjust the size of the triangle on the layout (note any changes on your version of the Material List). Just make sure all three beams are the same length so the triangle stays centered. Set your table saw blade to 30° and use the miter gauge to trim the triangle sides (pieces 5) to length, as shown in the Elevation Drawing on When building complex shapes, nothing is as helpful as a storyboard or a full-size layout drawing to build from. Here the author test fits his components to the storyboard. Any variations or potential problems are easy to spot as he builds each piece in sequence. Remember, a minute of planning is worth an hour of power. Glue the first two laminations together, offsetting their ends by six inches. Be sure the outer lamination starts and stops where you drilled the two clamp holes side-by-side. Set the clamped-up apron and form aside to cure for at least two days. You want the wood to acquire a "memory" for its new shape before you release the clamps. Then apply the final lamination, offsetting and starting and stopping as described above. Leave this one clamped in place for a couple - \ ' of days as well. - |


